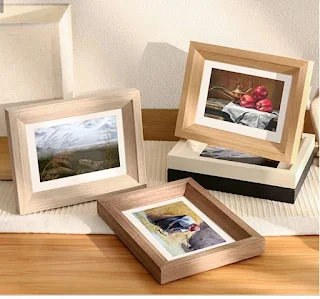
DIY Wooden Picture Frame: Step-by-Step Guide with Video Tutoria
DIY Wooden Picture Frame: Step-by-Step Guide with Video Tutorial
 |
| DIY Wooden Picture Frame |
Looking to add a personal touch to your home décor? A DIY wooden picture frame is a fantastic project that allows you to create custom frames to showcase your favorite memories or artwork. Whether you want rustic charm or a more modern design, building your own picture frames is both a fun and rewarding experience. Below, you’ll find a comprehensive guide to help you build a beautiful wooden picture frame, along with a video tutorial to guide you step-by-step.
Why Build a DIY Wooden Picture Frame?
DIY wooden picture frames are a versatile and stylish way to display your cherished photos or artwork. Here’s why you should consider building your own:
- Customization: You can design the frame dimensions, style, and finish to perfectly match your home décor.
- Cost-Effective: Making your own picture frame is usually more affordable than buying pre-made frames.
- Personalization: Crafting a frame allows you to infuse it with your personal touch, creating a unique piece of art.
- Quality: Handmade wooden frames tend to have better durability and aesthetic appeal compared to store-bought options.
Materials Needed for a DIY Wooden Picture Frame
Before starting your project, gather the following materials:
- Wood: Choose the type of wood that matches your desired style (e.g., pine, oak, or birch).
- Measuring Tools: Tape measure, square, and a straight edge for accurate measurements.
- Saw: A saw like a miter saw or hand saw to cut the wood pieces.
- Clamps: To hold the frame pieces securely during assembly.
- Wood Glue: To bond the frame joints together.
- Sander: For smoothing out the wood surface.
- Finishing Supplies: Paint, stain, or varnish for a polished look.
- Hanging Hardware: Picture hanging brackets or hooks.
- Safety Gear: Safety glasses, gloves, and a dust mask.
Step-by-Step Guide to Building a DIY Wooden Picture Frame
Step 1: Measure and Plan Your Frame
The first step in building a wooden picture frame is to measure and plan your design:
- Measure Your Photo or Artwork: Measure the dimensions of the photo or artwork you want to frame.
- Determine Frame Size: Add a few inches on each side of the photo for a nice border and dimension.
- Sketch Your Frame Design: Draw a simple blueprint of the frame, including the width of the frame and how deep you want it to be.
Step 2: Cutting the Wood Pieces
Now it’s time to cut your wood pieces according to your measurements:
- Cut the Frame Pieces: Use a miter saw to cut four pieces of wood to the appropriate length for the frame.
- Cut the Miter Angles: Use the saw to cut 45-degree miter angles at the ends of the wood pieces to join them at the corners.
- Cut the Back Panel: Measure and cut a separate piece of wood to act as the back panel for the frame.
Step 3: Assemble the Frame
Now that your pieces are cut, assemble the frame:
- Assemble the Corners: Use wood glue and clamps to join the mitered edges of the frame pieces, ensuring everything is aligned properly.
- Secure with Nails or Screws: Once the glue dries, secure the joints using nails or screws.
- Attach the Back Panel: Secure the back panel to the frame using nails or screws, leaving enough space for the photo to sit inside.
Step 4: Sand and Finish the Frame
Sanding and finishing will give your frame a polished look:
- Smooth the Surface: Use a sander to smooth out any rough edges or surfaces.
- Apply Stain or Paint: Choose a finish that complements your home décor and apply it evenly.
- Seal the Frame: Apply a protective finish such as varnish or polyurethane to ensure durability.
Step 5: Attach Hanging Hardware
Once the frame is dry and fully finished, add hanging hardware:
- Install Picture Hangers: Attach brackets or hooks to the back of the frame.
- Hang Your Frame: Securely hang your picture frame on the wall.
Video Tutorial: Building a DIY Wooden Picture Frame
To make the process even easier, watch this video tutorial that takes you through each step:
Conclusion
Building a DIY wooden picture frame is a fun and rewarding project that allows you to showcase your creativity while enhancing your home décor. With the detailed steps and video tutorial provided, you now have everything you need to craft beautiful custom frames that reflect your personal style. Whether you are framing photos, artwork, or memorabilia, a handmade wooden frame will add a touch of elegance and charm to any space.


